Tuesday, May 27, 2014

more about the bus trip

The quilt show that my group went to last week was put on by the National Quilting Association. 
It was a good size show with lots of vendor booths for a little shopping...


There were booths selling, sewing and embroidery machines, long arm quilting machines, fabric, thread, notions, sewing furniture, rolling sewing machine bags, patterns , vintage fabrics,and more.

There were quilts every where. In the vendor booths...for inspiration...


And row after row of quilts that were entered for judging...

So amazing to see all the different designs...such creativity, precise piecing, intricate quilting patterns. 

I was inspired to buy this Australian fabric, Aboriginie designed.  Ironic, because when I visited Australia years ago, I stopped in a quilt shop to get some souvenir fabric. It was all from the United States!


The best thing about a bus trip is that we were dropped off and picked up at the door of the event center. Pretty nice for tired feet! 
Same for when we stopped to eat at Cracker Barrel on the way home.


Monday, May 26, 2014

games for a bus trip

Last week  my quilt group, the Mt Washington Quilting Bees, took a bus trip to Columbus Ohio, to a quilt show there. My friend, Pat, who was in charge of planning the trip, asked if I would help with figuring out some games for the ladies to play on the bus to help pass the time.

I searched around on the internet and came up with an idea that I tweaked a little and turned it into "Quilter's Derby" (like Kentucky Derby). I drew these pictures of quilters...all carrying cash and credit cards, and taped each to a paint stir stick.


On the bus, I divided everyone up into teams and gave each team a numbered quilter picture. The object was for each one to be handed clockwise around the bus and make it back to their team first.
Two dice were thrown for each turn. The first die showed which team would be moving their quilter picture and the second die showed how many seats it would be moving. It turned out to be fun and the winners were excited to win a fat quarter of fabric for every member of the team.


We also played a few games of Bingo using punch out cards...and one that involved racing to unroll and re-roll toilet paper. Wish I had gotten a chance to take a photo of that one.


Saturday, May 24, 2014

filled oatmeal peanut butter cookies

These cookies are favorites of  the boys and Lonnie. They are heavy and rich, though - you can't eat many.


Filled Oatmeal Peanut Butter Cookies

1 1/2 cups flour
1 t. baking soda
1/2 t. baking powder
1/2 t. salt
1 cup butter, softened
1 cup peanut butter
1 cup sugar
1 cup brown sugar
2 eggs
2 t. vanilla extract
2 cups quick cooking oats


Combine flour, baking soda, baking powder and salt. Set aside.

In a large bowl, cream together butter, peanut butter, sugar and brown sugar. Add eggs an vanilla. Mix well.
Gradually add flour mixture.
Stir in oats.

Drop by rounded spoonfuls onto a lightly greased baking sheet.

Bake In a preheated 350° oven for 8 to 10 minutes. My oven runs a little hot so I usually set it for 345° and the cookies are ready to take out at 8 minutes. I like them just slightly under done so they will be soft.

Cool the cookies completely.

While the cookies are cooling you can make the filling.

Filling
6 Tbsp. butter
1 cup peanut butter
2 cups confectioners sugar
5 Tbsp. Cream of half&half

Cream together butter and peanut butter. Add confectioners sugar. Add cream...one spoon at a time until mixture has a good spreading consistency.

Spread a generous amount on a cookie and top with another cookie. Don't worry if you run out of filling because the cookies are good alone, too.

Makes a huge batch...maybe 6-7 dozen cookies...but once you put them together with the filling it is only half as many!
This recipe came from the Allrecipes website.

Friday, May 23, 2014

a stupid chunk of concrete

Late last summer we had a crumbling concrete porch broken up and replaced with decking. When the demolition guys were here, I asked them to set aside a big concrete step from the 
porch. I thought I could use it in another area where we have a step down.

WRONG!

The thing was way heavier than I imagined. No way to maneuver to the place where I wanted it.  Really no way to move it anywhere!

I decided I would chip away a little at a time...until it was small enough to move.

Here it is with tools so you can better see how big it is. At one point we attempted to drag it up on that pallet...thinking maybe it could be pulled along the ground easier...sort of like a sled.


Junior gave it a couple of big wallops with a maul and it hardly fazed it.


We thought it might break in two.    Biggie-size this picture to see the moment of impact!

Nope.

At least he was able to turn the whole thing over for me...so it would be easier to break up on the rocky underside.
It turns out there was a metal pipe sticking straight out the bottom...there's no way it could have been dragged.


A couple of little frogs had been hanging out underneath while all this was going on.

Surely they must have been stunned or struck deaf.


They hopped away like everything was fine.


So here is how it looks now. Making a little progress.

You can eat an elephant. One bite at a time.

Thursday, May 22, 2014

what I am reading

Not exactly reading reading, but paging through this quilt pattern book I ordered...Nickel Quilts & Borders by Pat Speth.


 I have another of her "Nickel Quilts" books and it has a lot of good ideas in it so I thought (rightly) that I would like this one.

The author coined the term "Nicklel quilt",  because all of her patterns start with 5" squares...either used whole or cut down into smaller sections.

The unique thing about this particular book is that the quilts are pictured complete with one border, but then several alternative borders are shown,so that you can mix and match - make your own design. You could use these border ideas for other quilts as well.

There are several quilts I would like to make in this book. The instructions are clear and detailed so this would be a good book for a beginning quilter too.

Tuesday, May 20, 2014

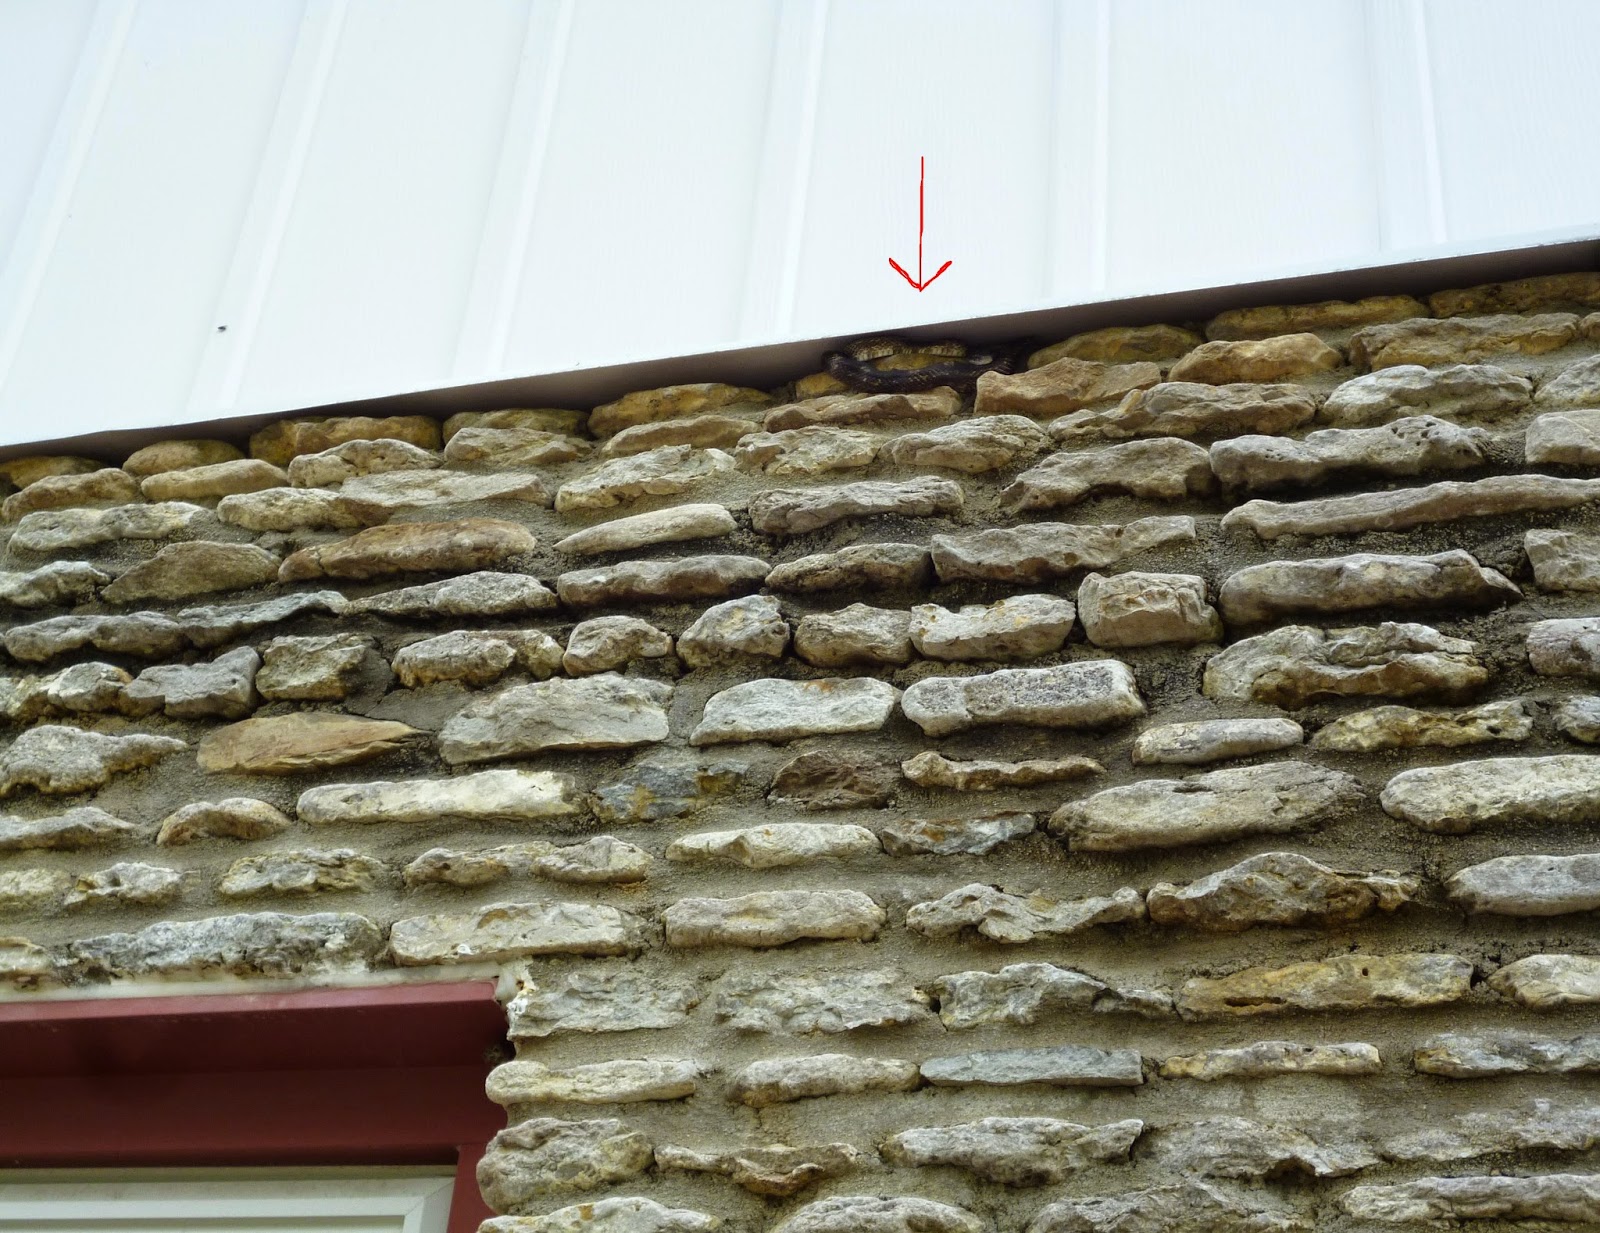
what's wrong with this picture?

A few days ago when it was rainy and turning cooler, I noticed something out of the ordinary as I was heading for the back door...


See anything? Let me zoom in a little for you...


I guess I was a little nervous - my pictures are all blurry!


Now, from inside the house I am very brave!


This is where he was headed. Trying to find a warm dry spot before a cold night.


He was still there the next morning ...

 But gone later in the day. Hope he finds another place to hang out!


Monday, May 19, 2014

birthday cake

We were celebrating Junior's birthday so I baked a BIG cake.

Cake mixes are smaller than they used to be but the instructions are still to bake in the same size pans...producing a thin, sad looking little cake.
I decided to bake two cakes using these nice 9" square cake pans.


I baked them at 320 degrees hoping the corners wouldn't burn before the middle was done. It worked out pretty well...the chocolate one's corners were a little crispy.

How do you like this platter I painted at one of those "paint your own pottery" places? 


I sliced each cake into 2 layers.


And stacked them up with a thin layer frosting in between - Buttercream Frosting with a tablespoon of cocoa added to cut the sweetness a bit.


About this time I realized I hadn't bought any whipping cream that I usually use for the outside frosting.
I drove down to Kroger and was hurrying in so fast that my shoe flew off in the parking lot! 
I don't think anyone saw, though!


I found this Creamsicle ice cream to go with the orange cake. It was good!


Junior had been talking about getting a toaster oven and had this one on his wish list. It's a pretty nice one. It has a rounded back so it can hold a large pizza and hopefully some of his cast iron bakeware.


I also gave him a few packages of muffin mixes so he can try it out right away.
Happy Birthday, little dude!